3MT video recording competitor guide
Even the world’s best public speakers prepare before important presentations. To assist you with your preparations, please find a few suggestions below that will help you in writing your presentation, creating your slide and practising your presentation.
Write for your audience
- Avoid jargon and academic language.
- Explain concepts and people important to your research - you may know all about Professor Smith’s theories but your audience may not.
- Highlight the outcomes of your research, and the desired outcome.
- Imagine that you are explaining your research to a close friend or fellow student from another field.
- Convey your excitement and enthusiasm for your subject.
Tell a story
- You may like to present your 3MT as a narrative, with a beginning, middle and end.
- It’s not easy to condense your research into three minutes, so you may find it easier to break your presentation down into smaller sections.
- Try writing an opener to catch the attention of the audience, then highlight your different points, and finally have a summary to restate the importance of your work.
Have a clear outcome in mind
- Know what you want your audience to take away from your presentation.
- Try to leave the audience with an understanding of what you’re doing, why it is important, and what you hope to achieve.
What not to do
- Do not write your presentation like an academic paper.
- Try to use shorter words, shorter sentences and shorter paragraphs.
- You can use humour, however be careful not to devalue your presentation.
Revise
- Proof your 3MT presentation by reading it aloud, to yourself and to an audience of friends and family.
- Ask for feedback.
- Ask your audience if your presentation clearly highlights what your research is about and why it is important.
Rules
Before you start work on your slide, you should take the following rules into account:
- One single static PowerPoint slide is permitted in the presentation (no slide transitions, animations or ‘movement’ of any description). This can be visible continuously, or ‘cut to’ (as many times as you like) for a maximum of 1 minute or submitted via email if not included in the presentation.
- No slide transitions, animations or ‘movement’ of any description are permitted;
- Do not use a transparent background on the slide;
- No additional electronic media (e.g. sound and video files) are permitted.
If you need to reference a picture, image or any kind of content in your slide, you can do it on the title page or at the bottom of the slide in a small box.
Suggestions
You may like to consider some of the following suggestions.
- Less is more: text and complicated graphics can distract your audience – you don’t want them to read your slide instead of listening to your 3MT.
- Personal touches: personal touches can allow your audience to understand the impact of your research.
- Creativity drives interest: do not rely on your slide to convey your message – it should simply complement your oration.
- Work your message: think about how your slide might be able to assist with the format and delivery of your presentation – is there a metaphor that helps explain your research?
- An engaging visual presentation can make or break any oration, so make sure your slide is legible, clear and concise.
Practice, practice, practice
- Feeling nervous before you present is natural, and a little nervousness can even be beneficial to your overall speech. Nonetheless, it is important to practice so you can present with confidence and clarity. Practicing will also help you gauge the timing of your 3MT so that you keep within the time limit.
Vocal range
- Speak clearly and use variety in your voice (fast/slow, loud/ soft).
- Do not rush – find your rhythm.
- Remember to pause at key points as it gives the audience time to think about what you are saying.
Body language
- Stand straight and confidently.
- Hold your head up and make eye contact.
- Never turn your back to the audience.
- Practise how you will use your hands and move around the stage. It is okay to move around energetically if that is your personality, however it is also appropriate for a 3MT presentation to be delivered from a single spot on stage.
- Do not make the common mistakes of rolling back and forth on your heels, pacing for no reason or playing with your hair as these habits are distracting for the audience.
Record yourself
- Record and listen to your presentation to hear where you pause, speak too quickly or get it just right.
- Then work on your weaknesses and exploit your strengths.
Look to the stars!
- Watch your role models such as academics, politicians and journalists, and break down their strengths and weaknesses.
- Analyse how they engage with their audience.
- View presentations by previous 3MT finalists.
Dress
- There is no dress code, if you are unsure of how to dress you may like to dress for a job interview or an important meeting. It is important that you feel comfortable so you can focus on your presentation.
- If you are presenting on a stage that has a wooden floor, be aware of the noise your footwear might make.
- Do not wear a costume of any kind as this is against the rules (as is the use of props).
Device options
Recording your presentation can be done using a camera and or handheld video recorder however most phones allow you to record through the camera function and most computers have recording ability (via camera or webcam) using inbuilt programs such as:
Windows
- Camera App
- Microsoft Photos - Video editing feature
Macintosh
- QuickTime
- iMovie
Online programs which you might like to consider include:
- Zoom - see how to record yourself via Zoom.
Filming at home
There are three factors to consider when selecting your location to ensure you are producing the best video possible: light, sound and background.
Light
Dark environments impact the overall quality of your video because cameras do not perform well in dim lighting. Ensuring you are well lit guarantees the camera and therefore, your audience, can see you clearly. Look for a room in your home that has lots of natural light. If you are using light from a window, ensure you are facing towards the window so light falls on you directly.
Any additional lighting you can introduce will further improve the quality of your video. Look around your home for desk lamps, torches etc. Watch this tutorial for more information.


Sound
When filming video at home, ensure you choose a very quiet environment where you have as much control over the sound as possible. For example, choose a small room where you have the ability to close all doors and windows. Make sure any noisy electronics in the room such as fans, air conditioners, computers, phones and possibly even your fridge are temporarily turned off. These are much louder in video than you may think and are very distracting to your audience!
Be aware of any audible interruptions you don’t have control over such as aeroplanes, lawns mowers and cars. Consider filming during a quiet time of day such as early in the morning when there are likely to be less interruptions. If there are audio interruptions during your recording, do not continue. Wait it out and try again at a later point!
Background
Aim for a clean, plain wall as your background, completely free of visual distractions from the waist up where you will be framing your shot.
Setup
Whether you’re filming on a phone, tablet or web cam, there are further factors to consider when actually setting up to film your video:
Support
Ensure phones and tablets have enough storage available, are in aeroplane mode, fully charged and either connected to a tripod or, placed on a stable surface (think creatively - Blu Tack to wall). Your friend cannot offer to be a tripod by holding your phone or iPad for you: Your video needs to be completely stable as movement is very distracting.
Camera orientation
Ensure phones and tablets are turned onto their side so the video is filmed horizontally not vertically. This is to ensure the finished video is the correct shape and size when uploaded to Vimeo.
Eyeline
To ensure your eye line is correct, the tripod or surface where your recording device is placed, should be high enough so that the camera lens is in line with your eye level. Try to avoid the camera lens having to either point up or down towards you.
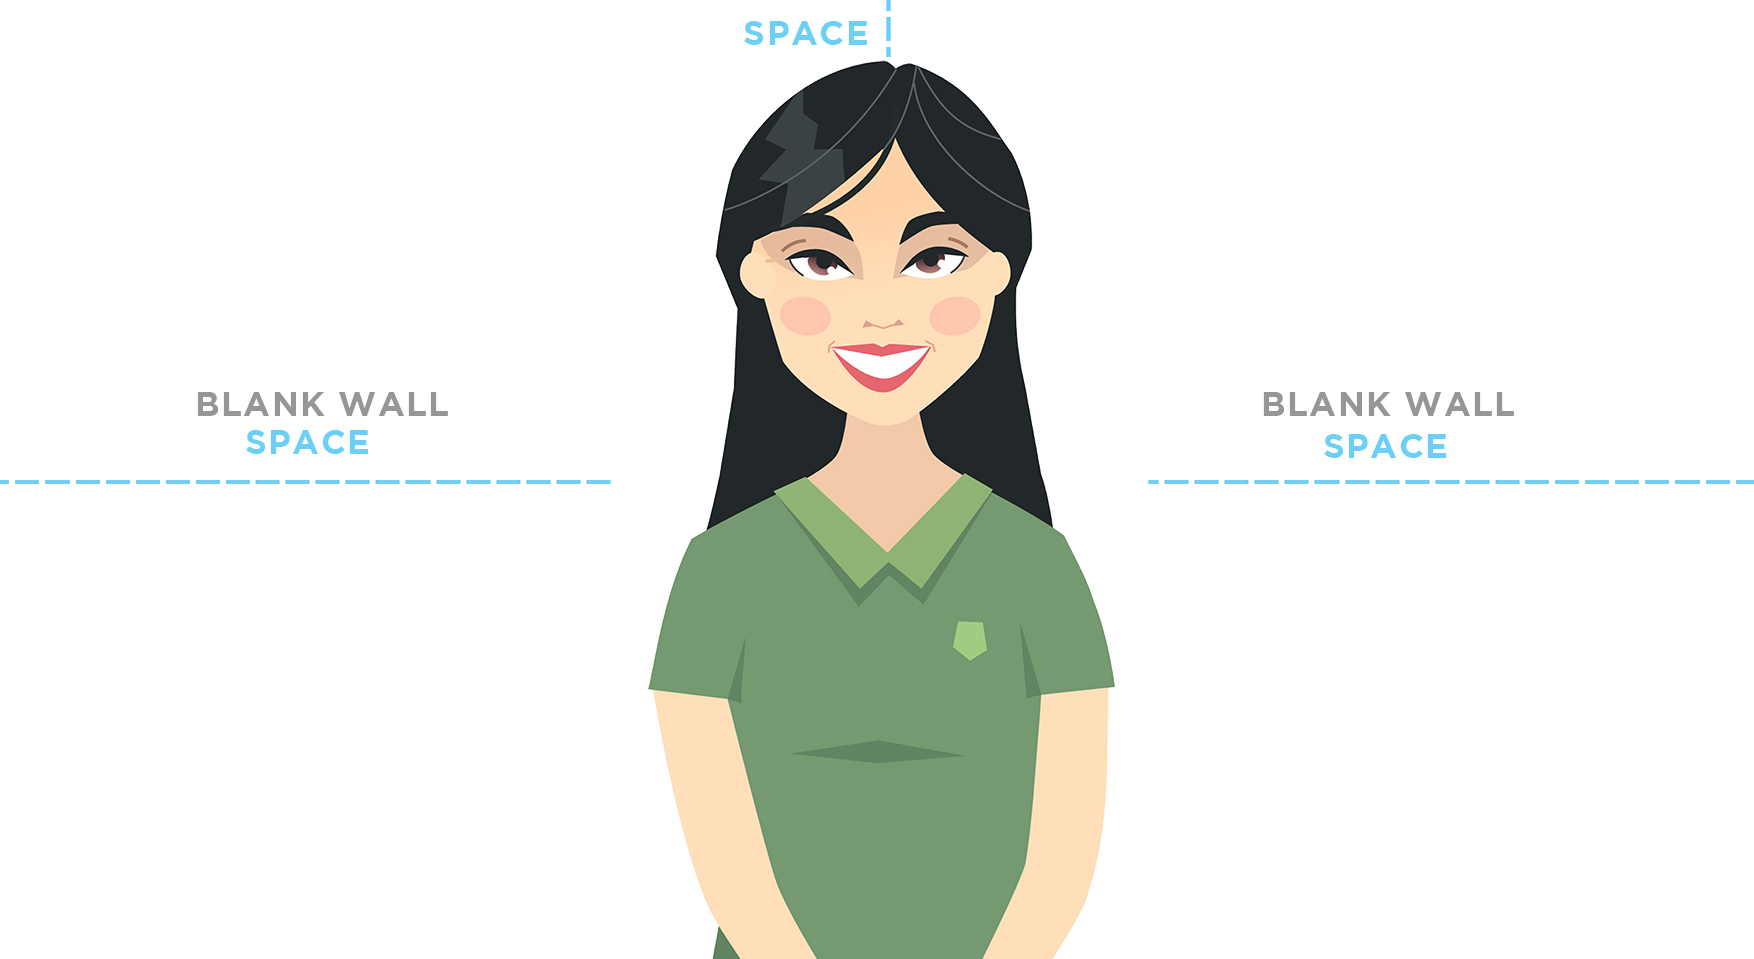
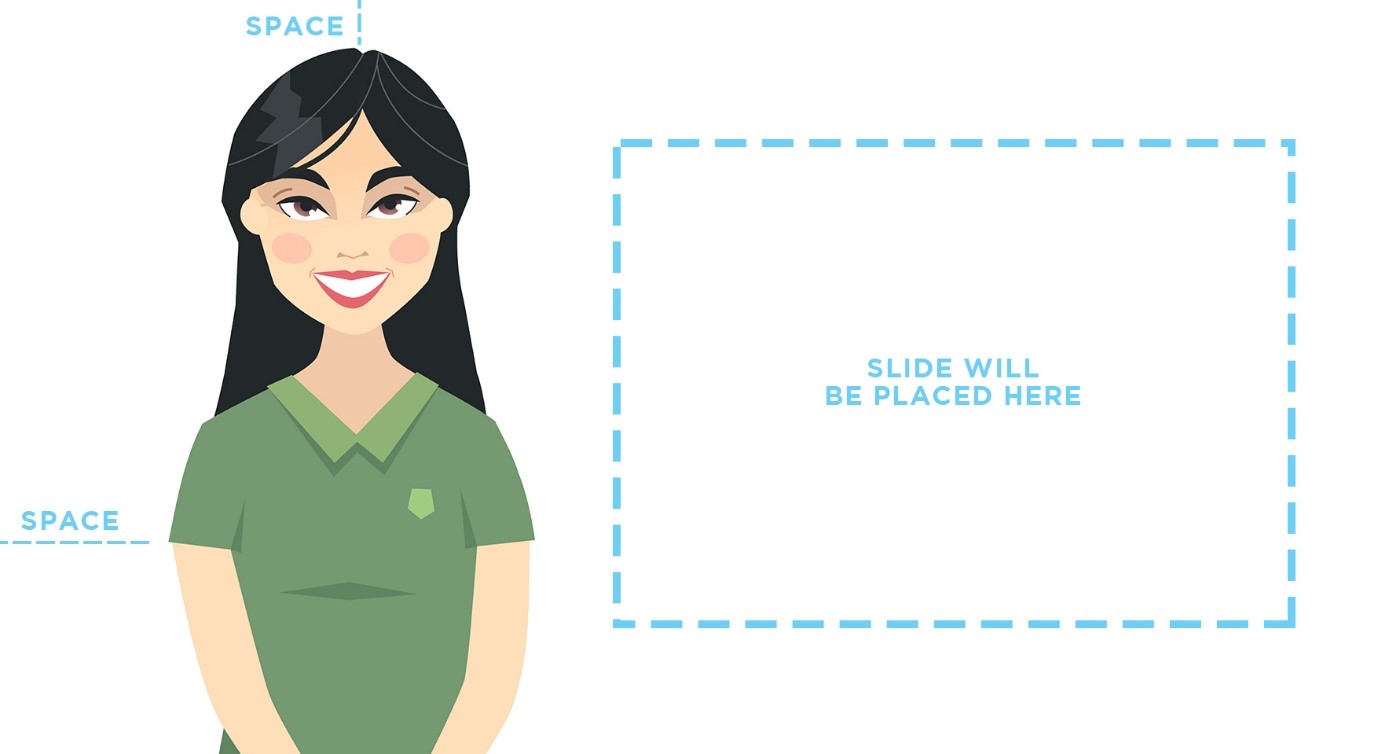
Framing - Two Options
1. Set up your shot so you are in the centre of the frame, not being cut off at the top and so you can be seen from the waist up. Ensure there is equal space and just the blank wall background on either side of you. (example below).
2. Set up your shot so you are to the left of the centre of the frame without being cut off at the top and so you can be seen from the waist up. The right side of the video frame should be just the blank wall background, as this is where your slide will be edited in. (example below)
Focus
Before you start recording, ensure your device is able to auto focus on you and isn’t focusing on anything else around you instead. Be sure to watch your recording back and ensure you remain in the focus the entire duration.
Proximity
Ensure your recording device isn’t too far away from you. The microphone on the device should be as close to you as possible to achieve both the desired framing and to ensure the audio is as clear as possible.
Test recording
Complete a short recording of a portion of your talk. Ensure you are speaking at the volume you intend to use for your presentation. Review the test recording to ensure all of the above elements are complete and working.
Presentation tip
Be aware of your eye movement. Maintain eye contact with the camera lens as though they were a person in the audience watching you present live.
For ideas and inspiration on how to develop your own 3MT presentation, please see the below links for many examples of previous 3MT finalists from a broad range of disciplines:
Virtual presentations:
Live presentations:
- Past UQ Competition Finalists (see pre-2020)
- Past Asia-Pacific Competition Finalists (see pre-2020)
- Past Finalists from around the world